


Hey guys! I have a NEW FREE TUTORIAL {How to do a FLASH HEADER} this is for Blogger Plataform, but you can use it for any purpose, I hope you like it, so ENJOY it!!!
Here the steps:
1.- Make your Header Image using any design or photo editing program like "Photoshop, Paint or Photoshop Elements", Im using "Photoshop" so 2 important things:
- Check your Header size, in my case {1000 x 308 px}
- Live the photo área "Transparent" and save the Header as a PNG

2.- This is The Flash Environment to help you guy to find everything:

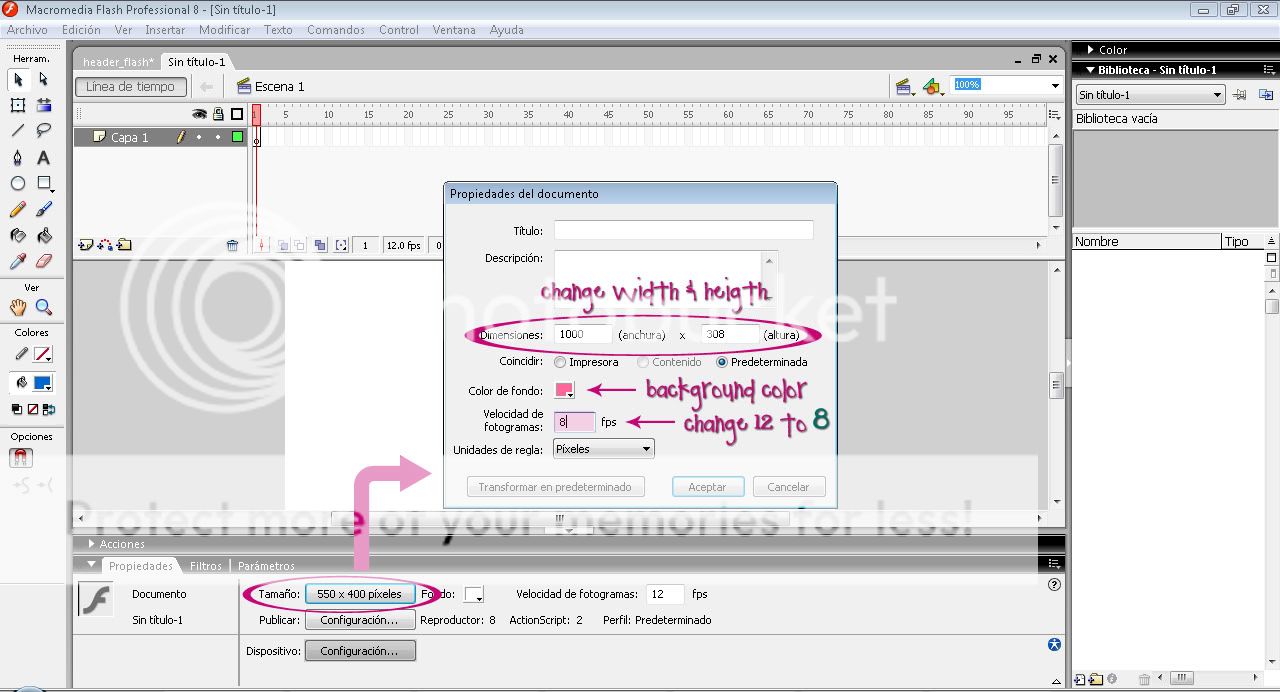
3.- Open Adobe Flash, then click the Size Button and put the width and height of your Header. Then change de Background Color if you want and change 12 to 8 FPS {frames per second} and click OK
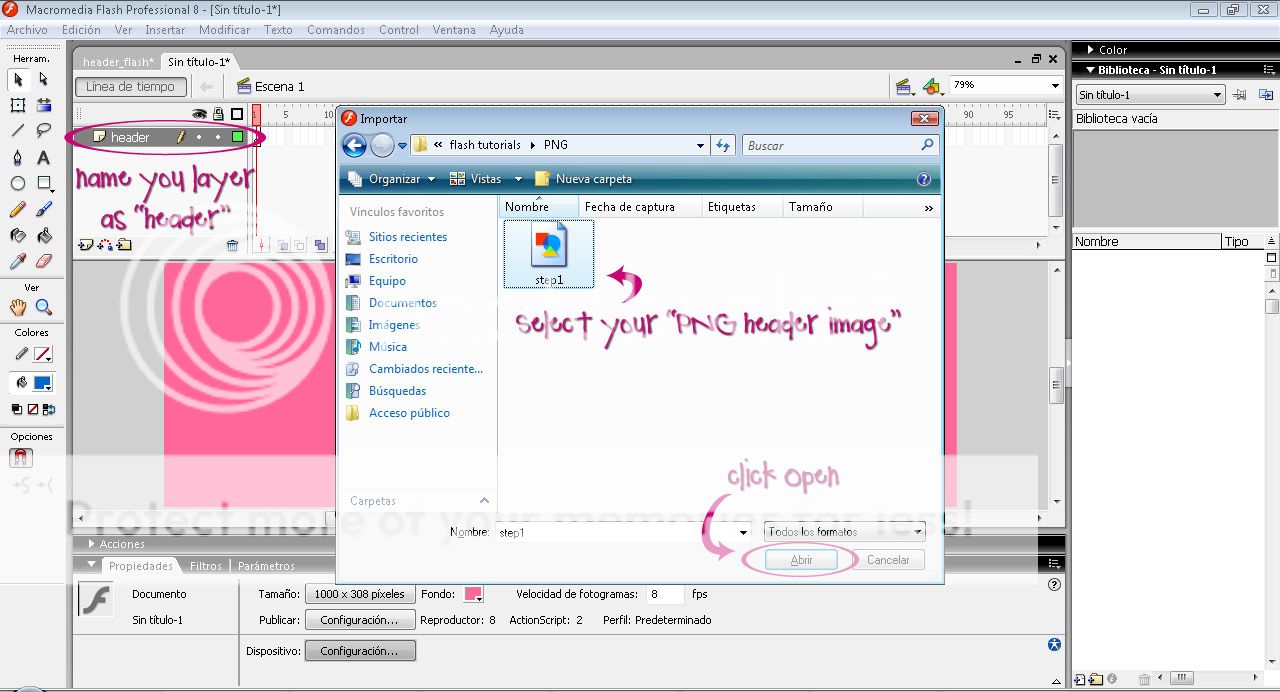
4.- Change your layer name to "Header" with double click {name your layers is important and helpful}, then press {Ctrl-R} to import you PNG Header Image and Click Open
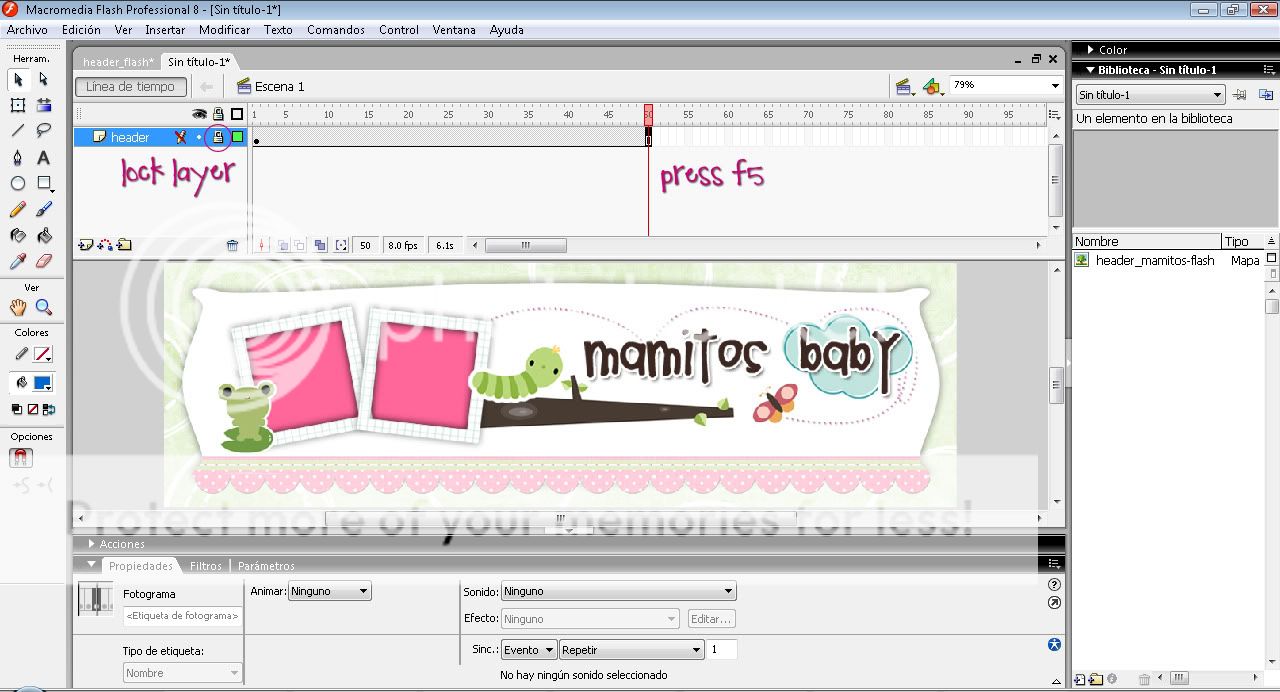
5.- You have to see your header image, click your 50th frame in the Timeline and insert a frame {F5} and lock your layer by activating the lock icon

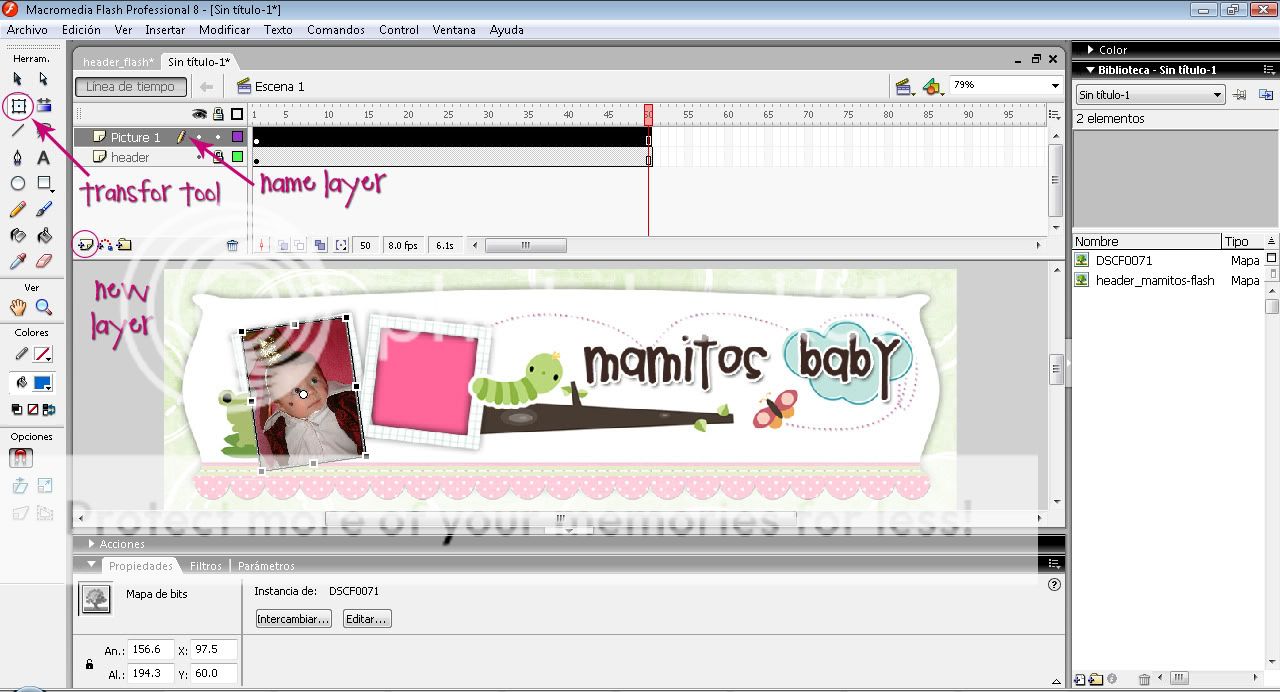
6.- Create a New Layer and name it "Picture 1", then press {Ctrl-R} and select your first picture, resize and rotate it by pressing {Q} or with "Free Transform tool" to fit your header photo area.
7.- Now select the black arrow tool and press {F8} to convert your picture in a Symbol or Modify Menu > Convert to Symbol, then Select the Movieclip Behavior and name the symbol, as 'Picture1' and click Ok.

8.- Double-click in the picture on the stage to switch to its symbol editing mode. Click on the 15th frame in the Timeline and insert a Key Frame {F6}. Now right-click the 14th frame in the Timeline and select Create Motion Tween (or Motion option from the Tween panel of the Properties inspector)

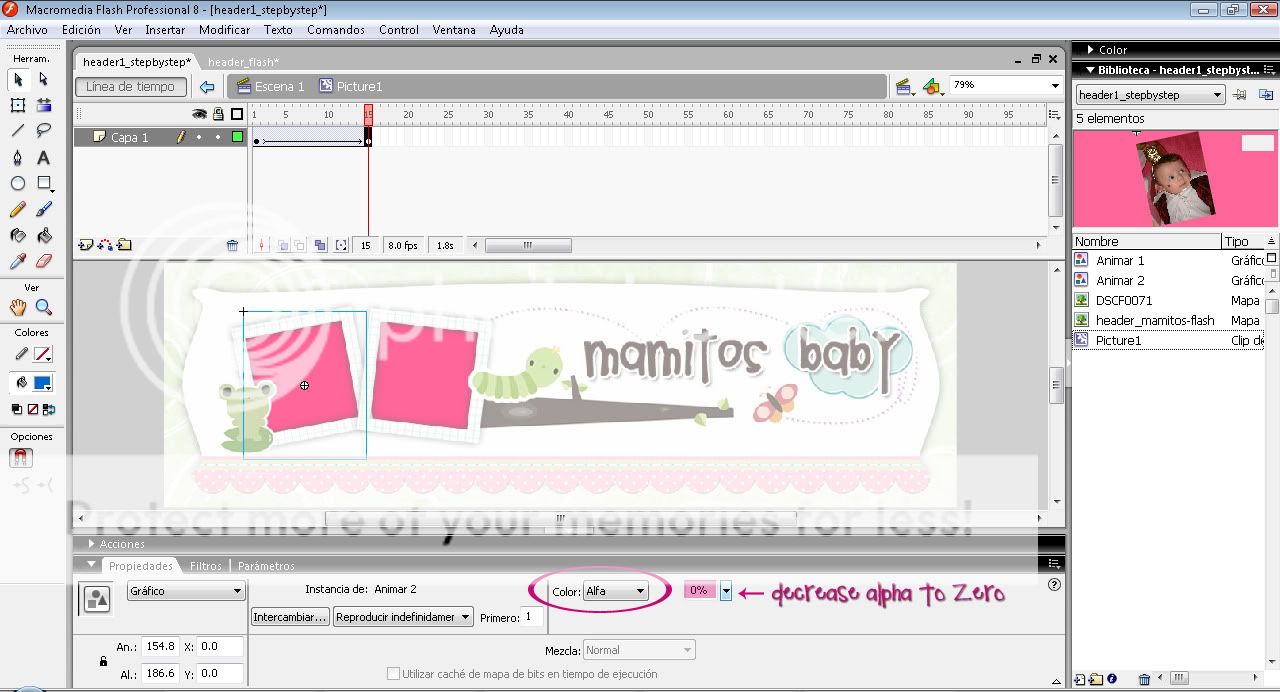
9.- Select the 15th frame and click the picture on the stage and in your Color option from the Properties Panel select "Alpha" and decrease it to "0%" and lock the Layer.
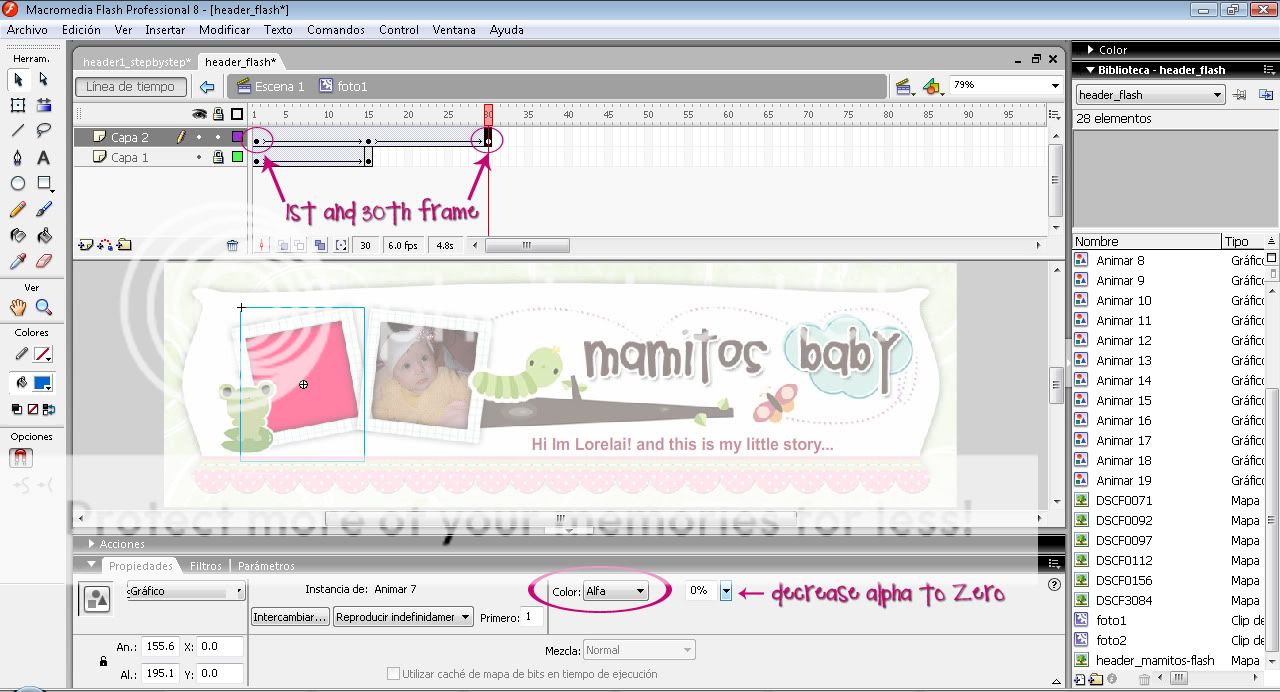
10.- Create a New Layer and import another picture {Ctrl-R}, resize and rotate it. Now Click on the 15th frame in the Timeline and insert a Key Frame {F6} and right-click the 14th frame in the Timeline and select Create Motion Tween. Click on the 30th frame in the Timeline and insert a Key Frame {F6}, Right-click the 29th frame in the Timeline and select Create Motion Tween. Click on the 1st frame and click your image on the stage and in your Color option from the Properties Panel select "Alpha" and decrease it to "0%". Repeat the alpha step in the 30th frame and lock the layer.
11.- Create a New Layer, click on the 15th frame in the Timeline and insert an empty frame {F7}, then import another picture {Ctrl-R}, resize and rotate it. Now Click on the 30th frame in the Timeline and insert a Key Frame {F6} and right-click the 29th frame in the Timeline and select Create Motion Tween. Click on the 45th frame in the Timeline and insert a Key Frame {F6}, Right-click the 44th frame in the Timeline and select Create Motion Tween. Click on the15th frame and click your image on the stage and in your Color option from the Properties Panel select "Alpha" and decrease it to "0%". Repeat the alpha step in the 45th frame and lock the layer.
12.- Create a New Layer, click on the 30th frame in the Timeline and insert an empty frame {F7} and unlock the 1st layer, click on the 1st frame in the Timeline and copy the image {Ctrl-C}. Go to the 30th frame on your 4th layer and press {Ctrl-shift-V} to paste it in the same place. Now Click on the 45th frame in the Timeline and insert a Key Frame {F6} and right-click the 44th frame in the Timeline and select Create Motion Tween. Click on the 30th frame and click your image on the stage and in your Color option from the Properties Panel select "Alpha" and decrease it to "0%". Lock the layer and back to Scene 1.

13.- Drag Picture 1 Layer down the Header Layer.

14.- Repeat steps 6 to 13 as many times as you want or need, just remember to name the layers. In my case I just need 2 Picture Layers.
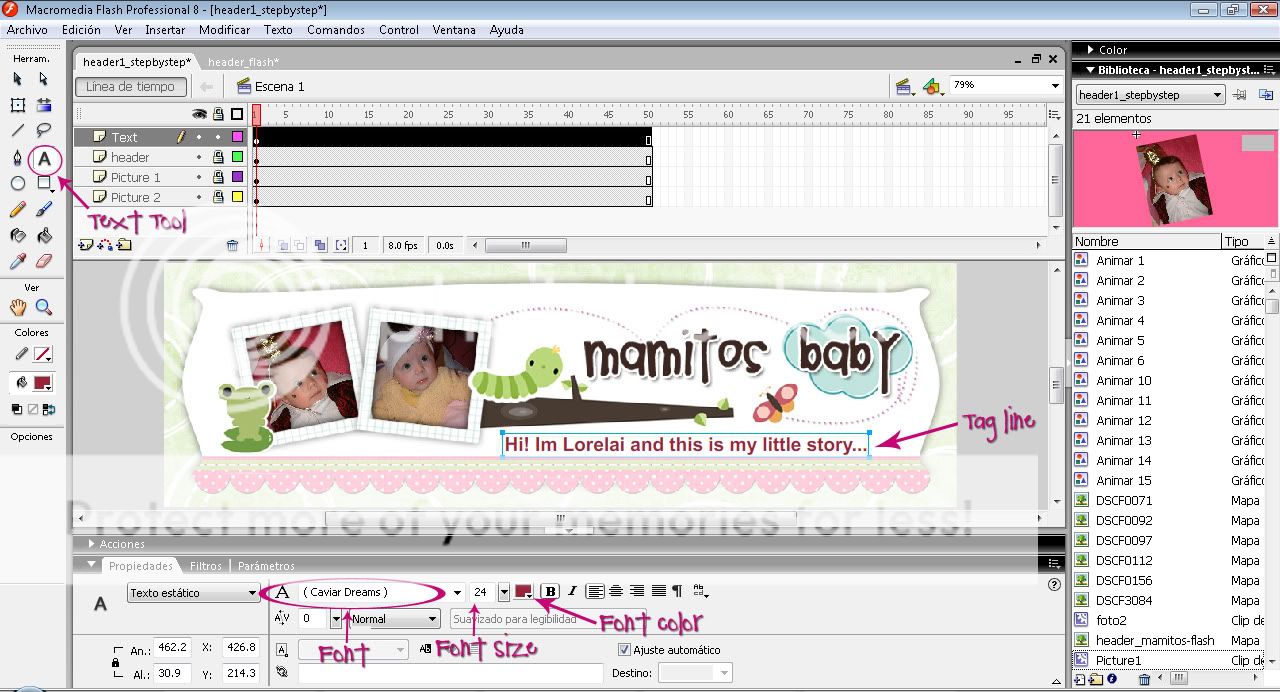
15.- Lets add some text or Tag line, Select the Header Layer, then Creat a New Layer and name it "Text". With your Text Tool Click on the stage and write your line, choose a cute font, add a great color and resize it as you need.
16.- Click on the 15th frame in the Timeline and insert a Key Frame {F6}. Now right-click the 14th frame in the Timeline and select Create Motion Tween. Repeat the same in the 30th and 50th frames. Clik the 1st frame and with the black arrow move the text to the right out of the stage.

17.- Click on the30th frame and click your image on the stage and in your Color option from the Properties Panel select "Tint" and select a color and increase it to "100%".

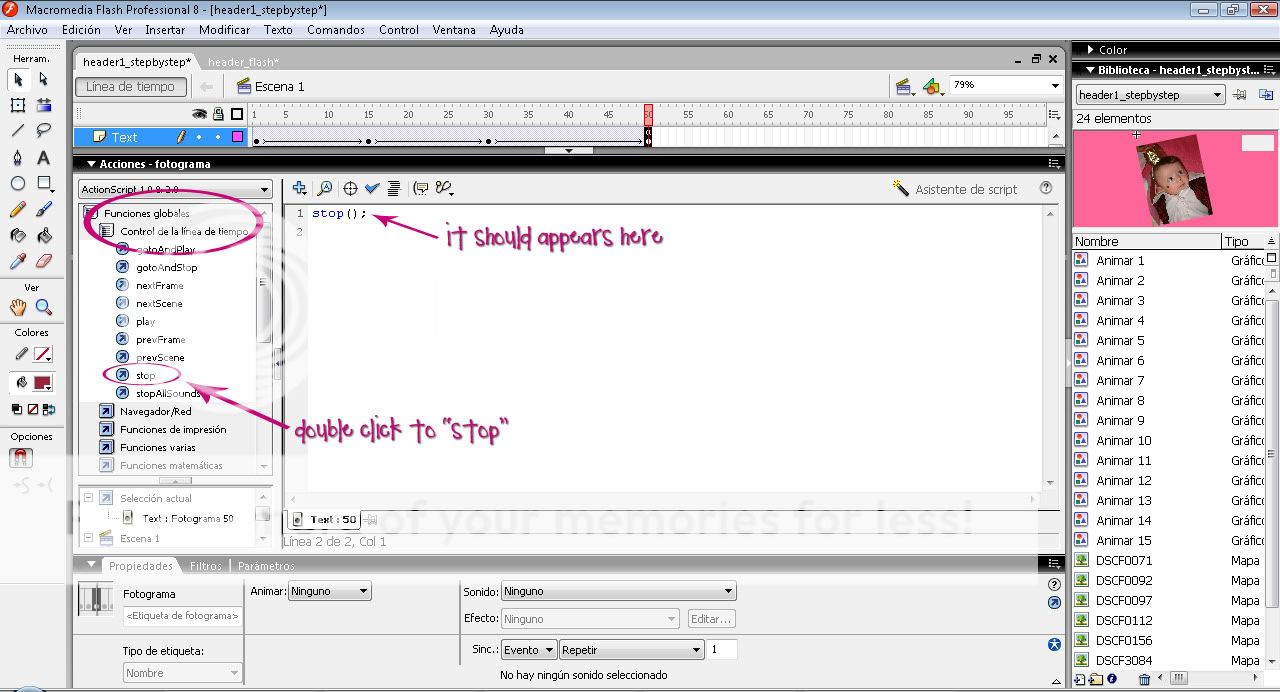
18.- The final step, Click on the 50th frame and Press {F9}, then in the Action Panels click the "Global Functions" and select "Timeline Control". Double-click to Stop. Press {F9}.
19.- Congratulations!!! Is Done just save yor file {Ctrl-S}. Now you have 2 files save it ".fla" (red icon) is your editing file and ".swf" (gray icon) is your movie wich you'll upload to photobucket account to add it to your Blog.


No hay comentarios:
Publicar un comentario